Palette Knives – Texture and Techniques for Acrylic Artists
When most people think of painting, they think of brushes. But if you're only using brushes, you're missing out on one of the most exciting and expressive tools in your acrylic painting toolkit: the palette knife.

Palette knives are not just for mixing paint—they can be used to build texture, create bold strokes, and give your paintings a dimensional, sculptural quality. Whether you want to add subtle peaks of paint or create entire landscapes with a knife, this post will teach you how to use palette knives effectively in your acrylic painting practice.
What Is a Palette Knife?
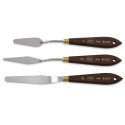
A palette knife is a flexible, flat tool used for mixing or applying paint. It has a blunt edge and comes in various shapes and sizes—some with rounded tips, others angular or pointed. Unlike brushes, palette knives don’t absorb paint, allowing you to work with thick, bold layers and create dynamic textures.
There are two main types:
- Palette
Knives: Designed for mixing paint on your palette.
- Painting
Knives: Designed for applying paint to the canvas.

While the terms are sometimes used interchangeably, painting
knives usually have offset handles to keep your fingers from smudging your
work.
Benefits of Using a Palette Knife
- Adds
Texture: Perfect for creating peaks, ridges, and movement in your
paint.
- Expressive
Marks: Great for gestural strokes and dynamic lines.
- Mixes
Paint Easily: Allows for smooth color blending on your palette.
- Saves
Brushes: Keeps your brushes clean when mixing thick mediums.
- Unique
Effects: Enables broken color, layering, and impasto techniques.
Here are several techniques you can try with palette knives:

1. Color Mixing
Use the flat side of the knife to blend paint directly on
your glass palette or canvas. This keeps your brushes clean and helps you
achieve purer hues.
Tip: Scrape off extra paint between colors to avoid
contamination.
2. Spreading Paint
Like frosting a cake, you can scoop up thick paint and
spread it onto the canvas in a smooth, even layer. Use the edge for clean lines
or the flat side for broader strokes.
Best For: Skies, backgrounds, and color blocking.
3. Scraping
Apply a thick layer of paint and then scrape it off in
places to reveal the underpainting. This technique is great for creating
weathered, rustic effects—especially in landscapes or abstracts.
4. Scumbling
Drag the edge of the knife lightly across textured paint for
a broken, dry look. It’s ideal for adding movement, especially in clouds,
waves, or foliage.
5. Impression Texturing
Use the tip or edge to “draw” with thick paint. Stab, swipe,
swirl, or twist to create different effects.
Try This: Tap the blade into wet paint to mimic stone
or bark textures.
6. Layering
Let a base layer dry, then add new knife strokes over the
top. Because palette knives lay paint on the surface rather than blend it in,
you can stack colors for amazing dimension.
Choosing the Right Knife Shape
Palette knives come in various shapes. Here's a quick
overview:
|
|
Best Use |
|
Diamond |
General painting, detail lines, and scraping |
|
Rounded Tip |
Smoother, softer strokes and blending |
|
Pointed Tip |
Detail work and carving shapes |
|
Angled Edge |
Great for scraping and controlled smears |
|
Long Blade |
Covering larger areas with flat color |

Start with a simple diamond or angled knife—these are versatile enough for most techniques.
Working with Mediums and Knives
Thick body acrylics or added mediums like modeling paste,
heavy gel matte, or clear tar gel pair beautifully with palette knives. These
give paint the body it needs to hold peaks and texture.
Recommended Mediums:
- Heavy
Gel Matte: Adds stiffness and keeps a matte finish.
- Modeling
Paste: Thick and gritty for extreme texture.
- Clear
Tar Gel: Creates stringy, drippy effects for abstract styles.
Palette Knife Painting Ideas
Want to get started? Try these beginner-friendly exercises:
- Abstract
Background: Use 2–3 colors and scrape them in bold layers across the
canvas.
- Mountain
Landscape: Use knives for ridged cliffs and snowy peaks.
- Still
Life: Create a thick, textured fruit bowl or vase of flowers.
- Seascape:
Use a knife to create crashing waves and rocky coasts.
Common Mistakes to Avoid
- Too
Much Pressure: Pressing too hard removes paint instead of layering it.
- Using
Thin Paint: If your acrylic paint is too runny, it won’t hold
shape—use heavy body or mix in gel medium.
- Ignoring
Dry Time: Layering before the bottom layer dries may result in muddy
colors.
- Overloading
the Knife: Start with a small amount of paint and build up.
Cleaning and Maintenance
Palette knives are generally simple to maintain. Simply wipe clean with a damp paper towel if the paint is still wet. If the paint has dried, then a little warm soapy water will make cleanup a breeze. The only caution I would offer, particularly around metal palette knives is to avoid dropping them because they can bend out of shape fairly easily.
Final Thoughts
Palette knives offer an exciting way to bring physicality
and energy into your acrylic work. Whether you're a beginner wanting to
experiment or a seasoned painter looking to add dimension, using palette knives
can elevate your art and push your creative boundaries.
So, next time you reach for a brush—pause. Try that palette
knife instead.


Comments
Post a Comment