Creating The Perfect Acrylic Painting Workspace
Setting Up Your Acrylic Painting Workspace (Even in Small Spaces)
When I first got into acrylic painting, I thought I needed a dreamy, Pinterest-perfect studio to really do it right. You know, exposed brick, giant windows, a dozen perfectly organized paint jars in rainbow order... but the truth is, that’s not how most of us start. Or even finish. What really matters is creating a space that makes you feel inspired and comfortable—no matter how small or humble it is.

For a long time, my painting setup was smack in the middle of our dining room. It wasn’t glamorous. It definitely wasn’t tidy. But it worked. I’d pull out my tabletop easel, roll over my trusty little cart full of brushes and paints, throw down a vinyl tablecloth to protect the surface, and just get to work. And when I was done? I packed it all away. It wasn’t a studio in the traditional sense, but it became my studio. And that made all the difference.
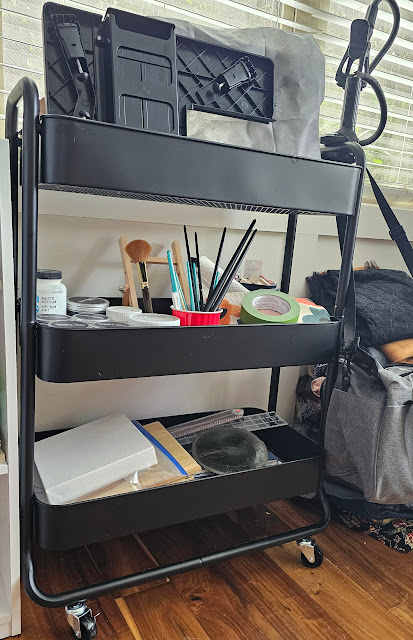
If you’re in a small apartment or sharing space with other people, flexibility becomes your best friend. Using a folding easel you can tuck into a closet when you’re finished, or turning an old kitchen cabinet shelf into a glass palette that fits right into a cupboard, are the kinds of creative little hacks that keep your space functional. One of my favorite things was using a three-tier rolling cart—those ones you can find at IKEA or craft stores. It held everything I needed and followed me around like a loyal little assistant. Just being able to roll it into a corner and have my table clear again made it easier to paint more often.
Now, if you have a garage, laundry room, or basement that’s not being used to its full potential, you might be sitting on the perfect studio spot. One of the best things about these types of spaces is that you don’t have to pack everything away at the end of the day. You can leave your easel out, brushes drying, canvases stacked against the wall—all ready and waiting for the next session. It makes it so much easier to start painting when you don’t have to set everything up every time. Just flip on the lights and go.
Speaking of lights, if your painting spot doesn’t get great natural daylight, it’s worth getting a few daylight-balanced bulbs or LED lamps. They help your colors stay accurate, especially if you’re painting at night or in a space without windows. And don’t forget airflow—if you’re working with mediums or sprays, keep a window cracked or use a fan to circulate the air. It might not seem like a big deal, but it’ll keep you feeling better during those long painting sessions.
Now, let’s talk about painting outside, because there’s something really special about plein air painting. Being out in nature while you paint brings a whole new energy to your work. But it does take a little planning. You’ll want an easel that’s made for travel—something sturdy with adjustable legs that can handle uneven ground. I like to keep a small travel kit packed and ready: a zippered pouch with mini tubes of paint, a collapsible water container, a couple of brushes I love, and a few paper towels tucked in for good measure. And of course, sun protection matters more than you think—there’s nothing worse than trying to paint with the sun glaring directly on your canvas. A big hat or a little shade umbrella can make a world of difference.

No matter where you paint—from your kitchen table to a breezy mountaintop—there are a few little things that always help. A glass palette is one of my must-haves. It’s smooth, reusable, and super easy to clean with just water and a scraper. I also love having two water containers: one for the real brush-cleaning work, and a second one just for quick rinses. I keep rags or paper towels nearby too, because let’s be honest—spills happen.
Now, I’ll be the first to admit I’m not always the best at cleanup, but it really does make things easier if you tidy up as you go. Wipe down your palette when you finish, rinse your brushes before the paint dries in the bristles, and maybe even lay down a drop cloth or a big old sheet before you start—especially if you’re working over carpet or a surface you care about. Trust me, scraping dried acrylic off your dining table is no one’s idea of fun.
One last little tip that might save your artwork someday: don’t store your finished canvases flat on the floor, especially in basements or anywhere humid. Moisture can sneak in, warp the wood, and even cause mold. Lean them upright against a wall, or better yet, hang them if you can.

At the end of the day, your art space doesn’t need to be perfect—it just needs to feel like yours. It should be a place that welcomes you back to the creative process, that feels just messy enough to be inviting, and just organized enough that you can actually find your favorite brush when inspiration strikes. You don’t need a big room or fancy tools to make beautiful things. All you need is a space that makes it easier to show up for your art.
So wherever you’re painting from—whether it’s a foldout table in the corner of your bedroom, a sun-dappled patch of grass in your backyard, or the laundry room no one ever uses—I hope it feels like a little creative sanctuary. And if it doesn’t yet? Give it time. Even the most makeshift spaces can become magic.
Let me know what your setup looks like—I’d love to hear how you’ve made your space work for you.


Comments
Post a Comment